ASSIGN CONTROLS TO TRIGGER ANIMATIONS
Now I want to trigger the different animations based on the keyboard input, so to do that I need to set up some input controls in the Project Settings. So go to EDIT > PROJECT SETTINGS
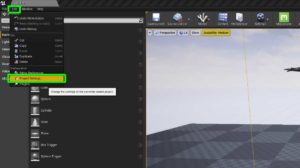
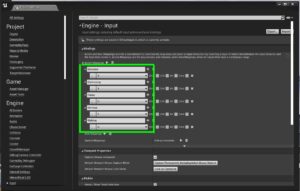
And then scroll down to INPUT and then we are going to add in some new Action Mappings so click on the little plus sign next to the title.

Give your action a name, here I have just named it the animation title, then click the small keyboard button underneath and assign the key input for that action. Do that for all the animations you have imported.
Now we want to tell our character to use these inputs and to play the animations when it detects them, so to do that we first need to set up an animation blueprint.
We do that by going to our Content Browser and selecting ADD > ANIMATION> ANIMATION BLUEPRINT
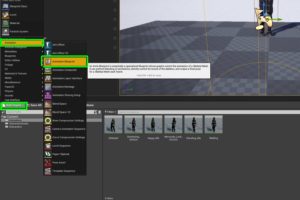
and select your characters skeleton to link the animation to.
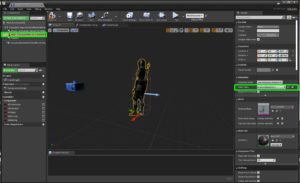
Now let’s go back to the character blueprint and link this Animation Blueprint to our character. Open up your character blueprint, select the mesh in the left hand side Components panel, and then in the right hand side Details panel scroll to the Animation tab. Make sure Animation Mode is Use Animation Blueprint and the for the Anim Class use the dropdown to select the Animation Blueprint you just created.
defining character variables based on input
So what I want to do is have the character play an animation based on the user input. So to do that I’m going to declare a few boolean values to be true or false dependent on the keys being pressed and released.
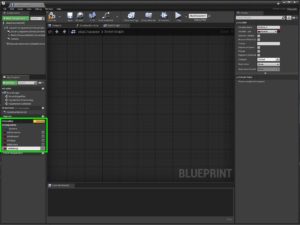
So go into your character blueprint and in the My Blueprint panel on the bottom left, go to the Variables section and click on the +Variable button to add variables. Add as many as you need.
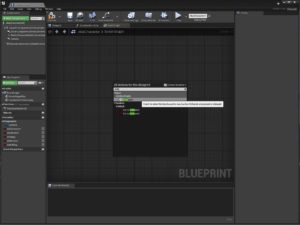
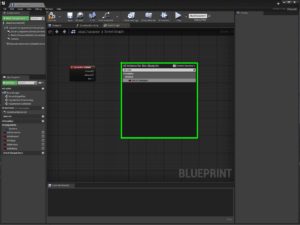
Now go into the event graph, right click and look for the first Input Action that you defined in the Project Settings Input panel and add it as a node. Mine was Defeated
Now you need to set your variables based on the button being pressed and released. We set the variables here and then in the animation blueprint we will read their value and play the required animations.
So when the button is pressed we want this character to set its variable to true and then when the button is released we will give it a delay for the length of the animation and reset it to false so that the animation can reset to the idle state.
To set your variables, right click and search for set varName where varName is your variable name. Mine is isDefeated.
The whole node set up will look like this. Don’t forget to tick the box for the variable when you want it to be true.

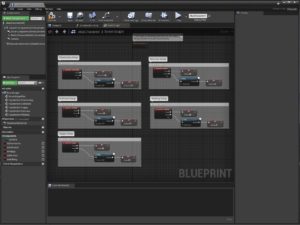
I have 5 different variables to set for my 5 different animations, so my character event graph looks like this
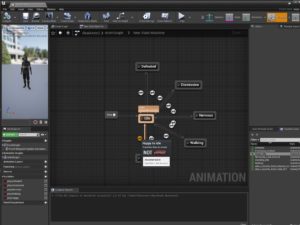
setting up the animation blueprint
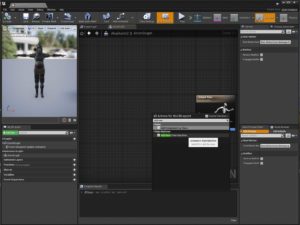
Right so our character is set up all ready to receive input an has the boolean variables updating correctly. Now we just need to tell it what animations to play in the Animation Blueprint. So go open up your animation blueprint and click on the AnimGraph tab and the first thing we’re going to do is right click to Add new state machine
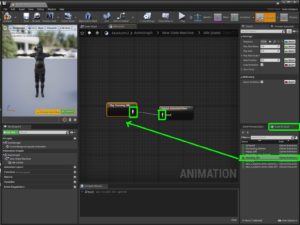
And you’ll link it up to the result animation

Double click the New State Machine node to open it up. Then what we’re going to do in here is add all the animations that our character can move between, and we’ll set up some rules for when it can go into the animations and back again. We will be referencing the boolean variables we set up in our character blueprint for that , but for now let’s just link up our animations.
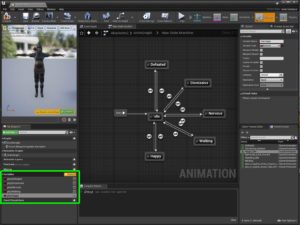
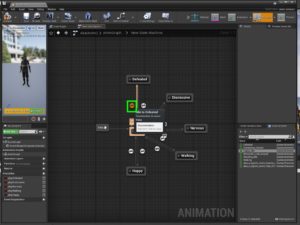
Right click and Add State and call this one Idle. This will be our default standing/hanging around doing nothing state. Drag an arrow from Entry to Idle.

And double click on Idle to open it up. Now on the right hand side you’ll see a tab for Asset Browser. Click on that and you will see all the animations associated with the skeleton. Choose the idle on and drag it into the graph. And then click and drag a connection between the two little human figures. So that is your Idle animation set up and since you have linked to it from the Entry node, it will go straight to it onload.
But we have a lot of animations we want to play when different keys are pressed. So we will go back out to the New State Machine and do the exact same thing to se up the other animations. We’ll link them up and make conditions for when they play next.
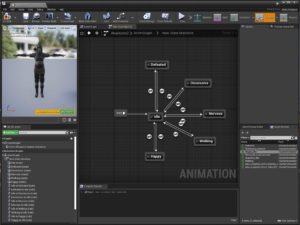
So your new state machine will look something like the image below, and inside each state you will have linked up the appropriate animation as you did in the image above.

Now link up all the animations to the Idle so that the character can alternate between them. Just click and drag from Idle to the State until you see the little blue and red icon with Create a Transition tag. Make transitions both to the states and back from them to the Idle state. It should end up looking something like this.
Now the next thing we need to do is to create some local variables that the state machine can use to know when it should trigger animations. We will define the variables here, but we will assign their value based on the value of the corresponding variable in the character blue print. IE the ones we assigned when the keys were pressed. So for me here I’m going to name them playDefeated, playDismissive, playNervous, playWalking and playHappy and I’m going to define them in the Animation Blueprint in the Variables tab in the My Blueprint panel on the left hand side. just click the + sign and type in your variable names. We will get their value in the next step.
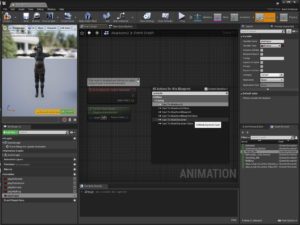
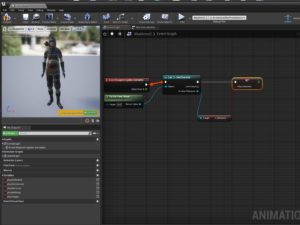
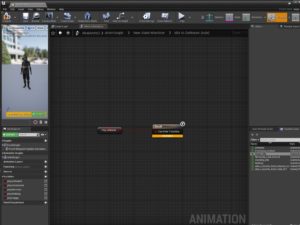
Now go into the Event Graph of the Animation Blueprint and we will grab the values from out character Blueprint. To do that we need to cast to the character blueprint. So right click and type in Cast to and then your character blueprint name. Mine is AkaiCharacter so I will type Cast To AkaiCharacter. It will come up in the list as you start typing.
Link up the nodes as shown below and then drag out a pin from the cast node and get the first animation variable you defined in your character blueprint. Mine is isDefeated, and then assign it to your local Animation Blueprint variable. Mine is playDefeated. Link them up as shown.
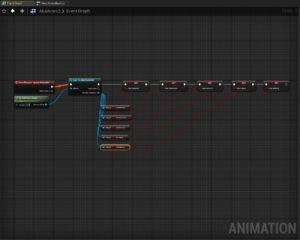
Now get and assign all your other variables. It should end up looking something like this.
So now that we have all the variables from the Character Blueprint assign to local variables in the Animation Blueprint, we can use them to tell the state machine when to play the various animation states that we set up. So go into the state machine tab and double click on the first circle leading from the Idle state to your first animation.
Right click and GET the variable that you want to be true for the animation to play. Mine is playDefeated. Link it up to the result node.
Now go back out to the state machine and double click on the circle that leads back from your animation state to the idle state. Now we want the character to return to the idle when the playDefeated variable returns to false. (this is set in the character blueprint and passed through into the Animation Eventgraph remember). So we need to get the variable again, but add in a NOT to make it negative. See below.

Do the same for the other animation states and hit COMPILE.
Now as you hover over the circles, the conditions that you just defined will show up.