I tried watching so many tutorials on how to successfully retarget animations from Mixamo to my Metahuman and none of them helped. Eventually I realised that it was a two step process. Step 1 – retarget Mixamo to the UE4 Mannequin. Step 2 – retarget from the UE4 Mannequin to my Metahuman.
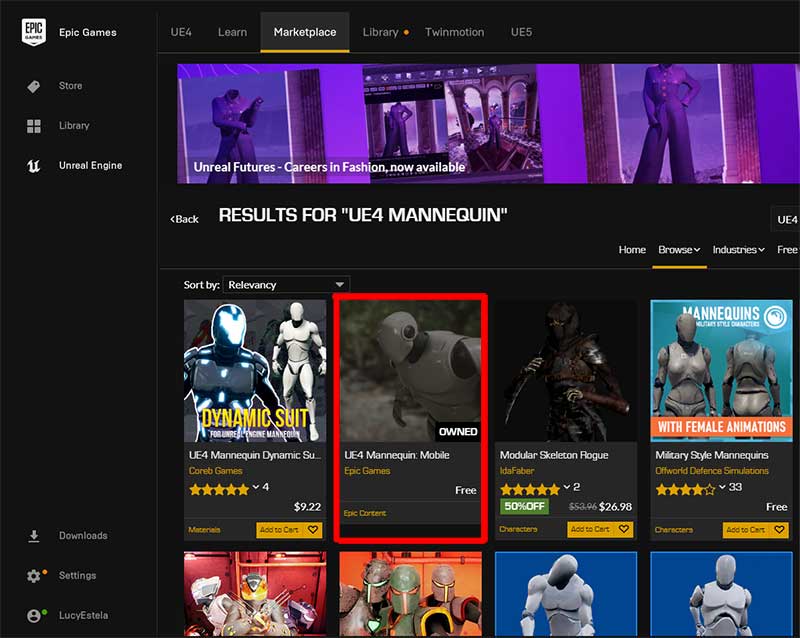
Now to start, I didn’t have the Mannequin in my file because I’m developing for the Hololens and my start file was blank. So if you search in your Content Browser for “Mannequin” and nothing comes up, then you’ll need to import one. The easiest way is to grab it from the Unreal MarketPlace. The pack you’re looking for is UE4 Mannequin Mobile by Epic Games. Load that into your project.
STEP 1A – IMPORT MIXAMO ANIMATION
Now go to Mixamo and log in or sign up. It’s totally free and has a lot of neat assets for you to play around with. I like to use Ybot when I’m choosing animations because I’m going to download the character and I don’t want my content browser filled up with all the materials and extra assets that the more complicated characters contain.
Choose Ybot and choose your animation and click the orange download button

download with these settings.
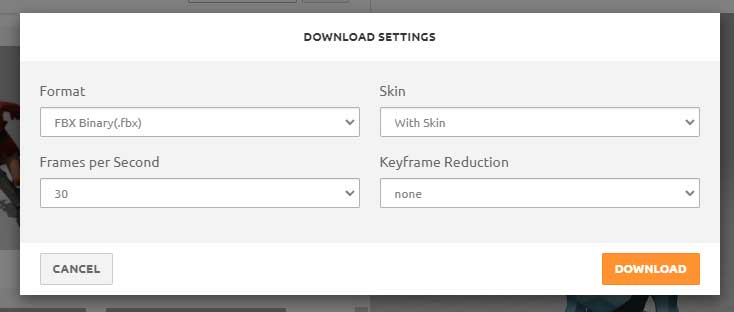
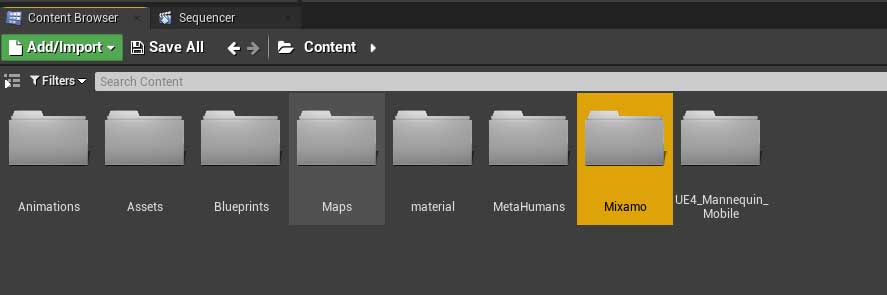
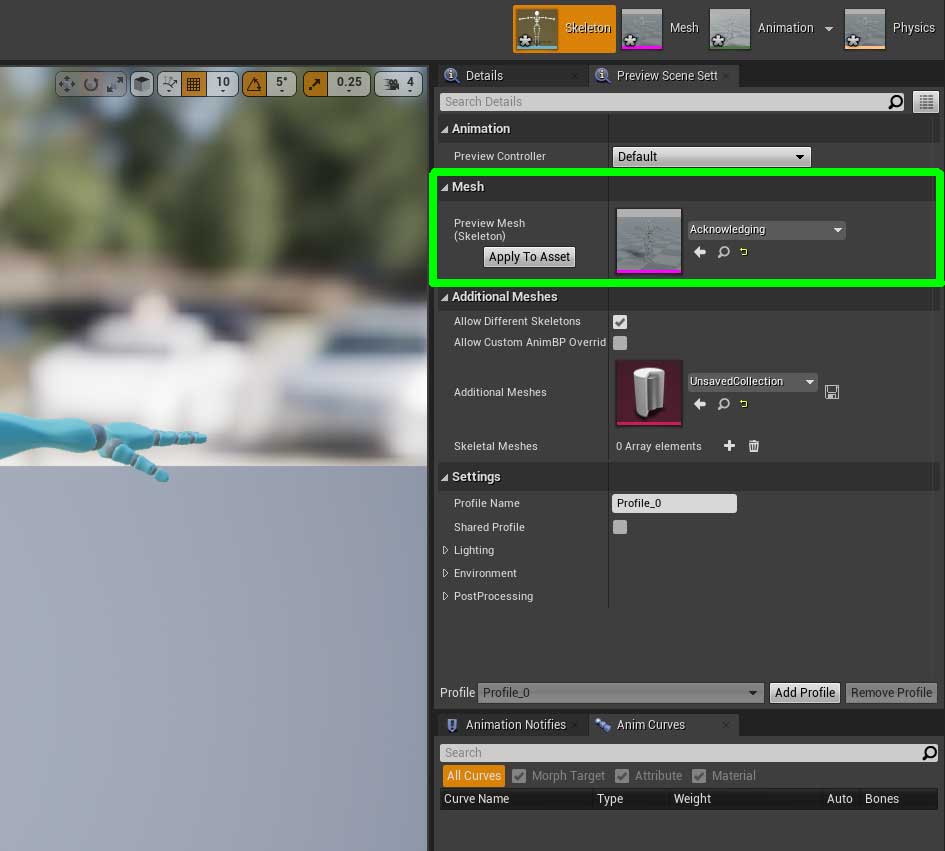
You will end up with a .fbx file in your downloads folder. Mine is called Acknowledging.fbx. Next we need to import that into your Unreal project. So make a new folder in your Unreal Content Browser for your Mixamo content. I’m just going to call mine Mixamo.
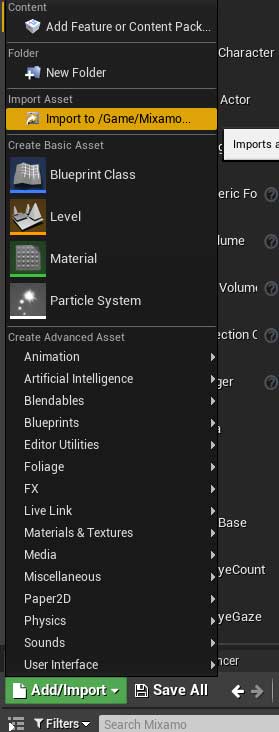
Open your new folder and select Add/import >> import to Game/Mixamo (Mixamo being my folder name)
I’m going to import two different animations so that I can use them on two different Metahumans. So there are some differences in the import settings between the first one you import and the second.
For the First one : The default settings should be fine, but compare to this screengrab here to make sure they are the same.

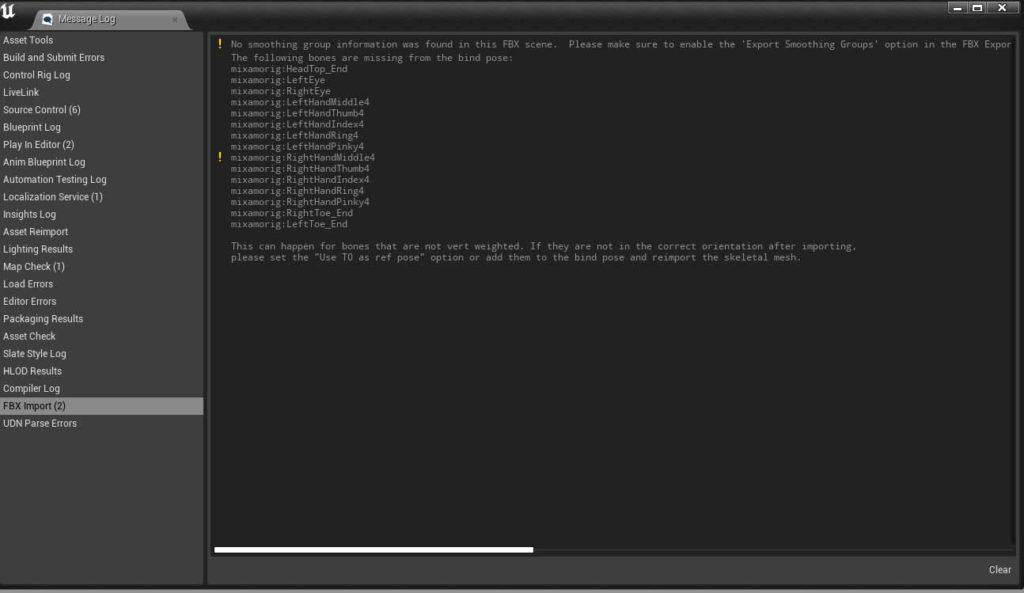
You’ll get some warnings in your message log, but ignore then, it’s fine.
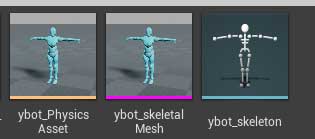
Once imported I like to rename a few of the assets so that they can be more generic and usable in other animations. So I rename the Physics Asset, Skeletal Mesh and Skeleton to reference the yBot that I used in Mixamo.
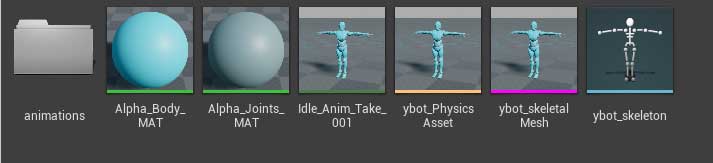
There are also two animation sequences. One is in a Tpose and we don’t use that one. The other shows the first frame of the animation you chose. You can double click it to open and see the animation if you want. To make things more clear for myself I rename the animation to something more simple (Here I’ve named it Anim_idle) and move it into an animation folder within the mixamo folder.

So now my Mixamo folder looks like this
For the second one : If you are importing a second fbx, we don’t need to Import Mesh so uncheck that box, and we want to assign the skeleton from the first mixamo fbx that we imported. That’s the one I renamed to ybot_skeleton. It might automatically choose that one, but if not just find it in the drop down.
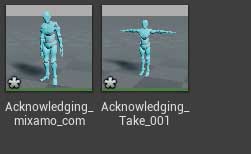
So my second import just added the two animation sequences. Again I’m going to ignore the T-pose one and just rename the Acknowledging_mixamo_com to Anim_Acknowledge and move it to my animations folder
SAVE ALL
STEP 1B – SET UP RIGS
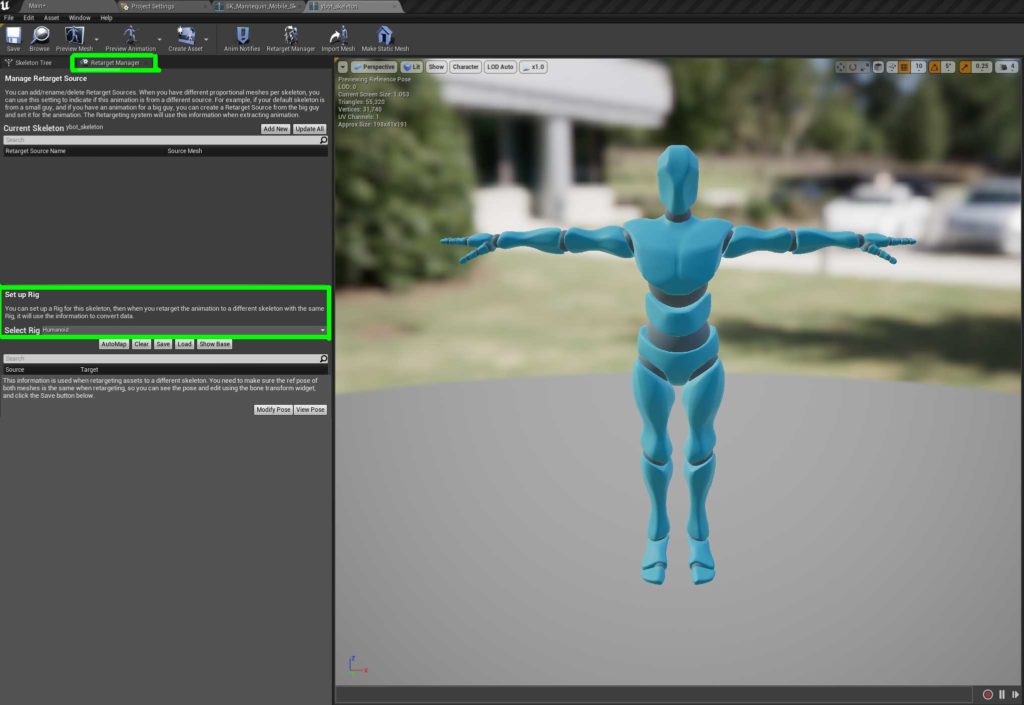
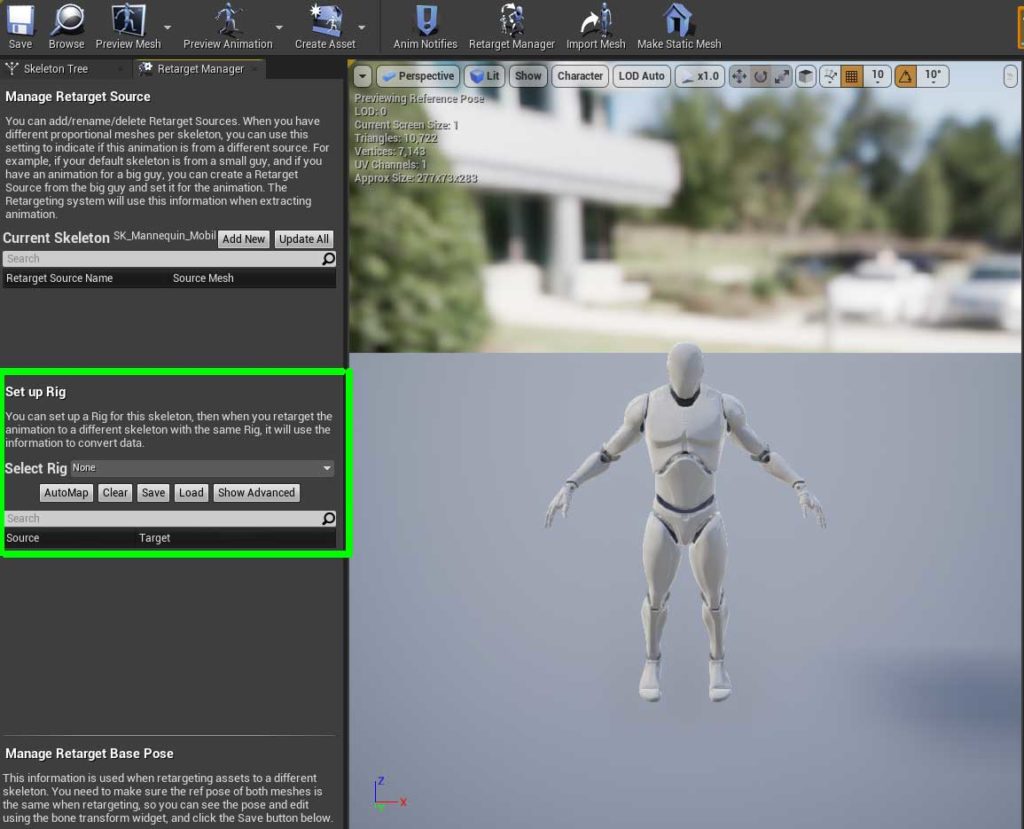
So the first thing we need to do is set up the yBot skeleton. so select it to open it

Open the Retarget Manager Tab at the top and in the Set Up Rig section, select Humanoid from the dropdown
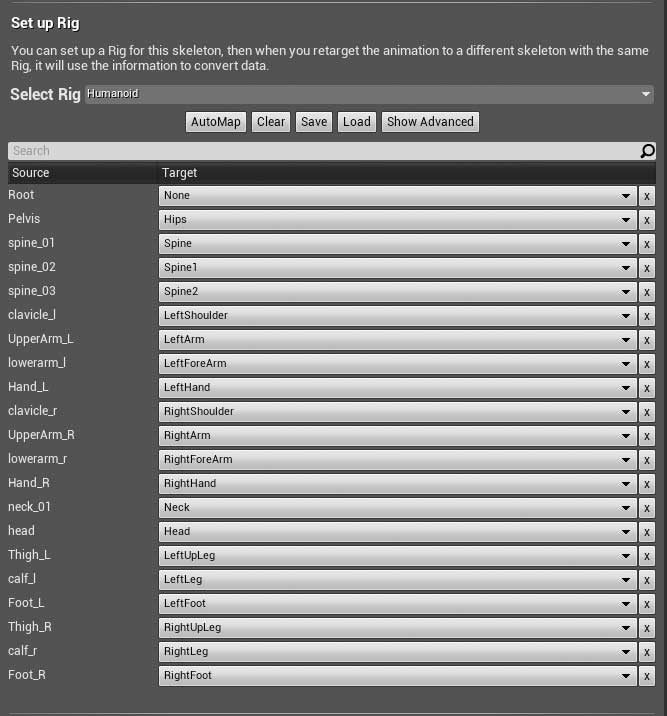
That will bring up the bones to retarget. Select Automap and it will do a pretty good job at filling in what it should be.
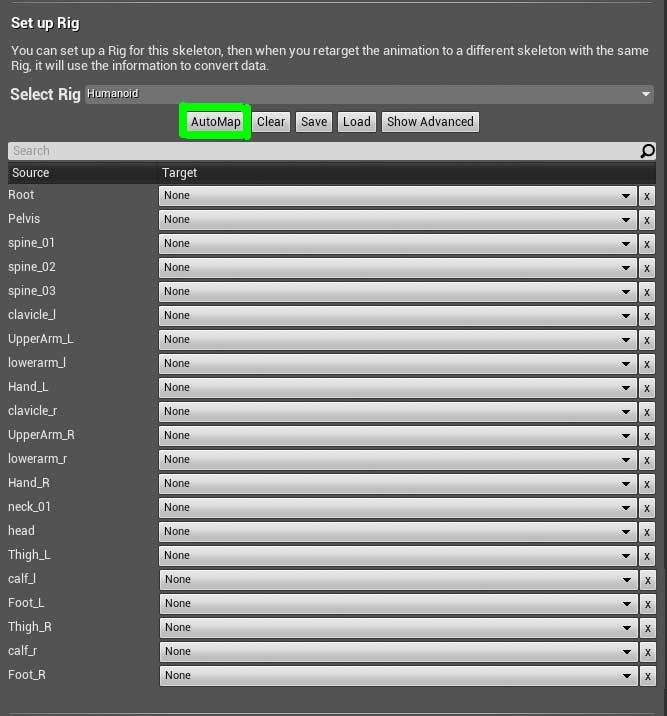
But it won’t be perfect, so just go through the options and make sure they match this set up.
Next hit the Show Advanced button
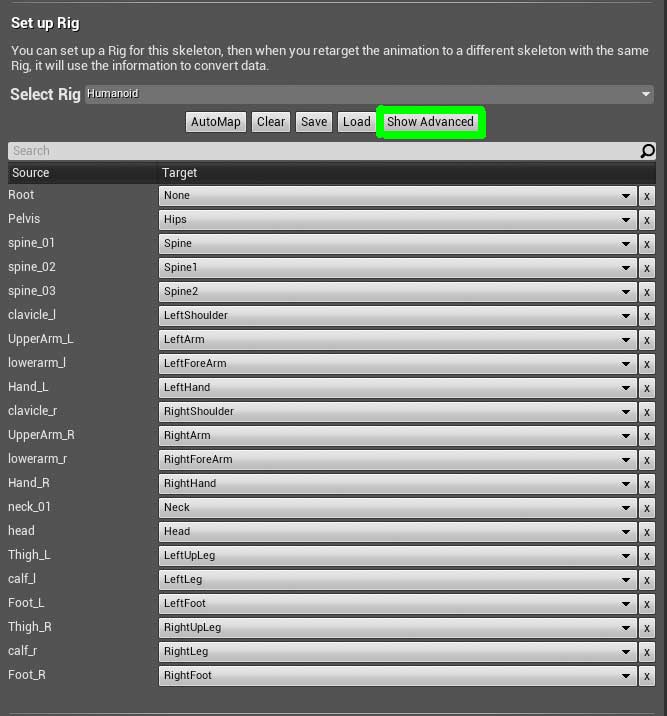
and you have to do all the finger and foot joints
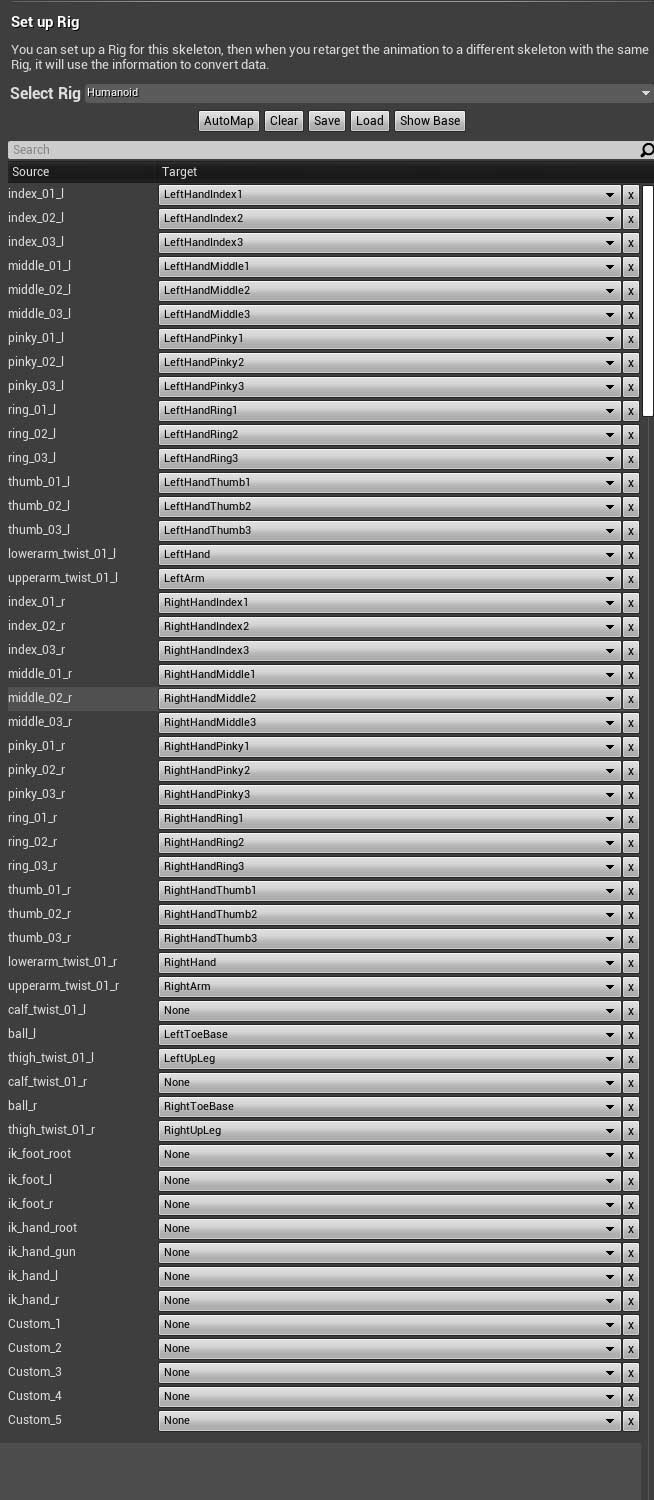
And lastly hit the Apply To Asset button on the right hand side to apply it all to the skeleton.
SAVE ALL
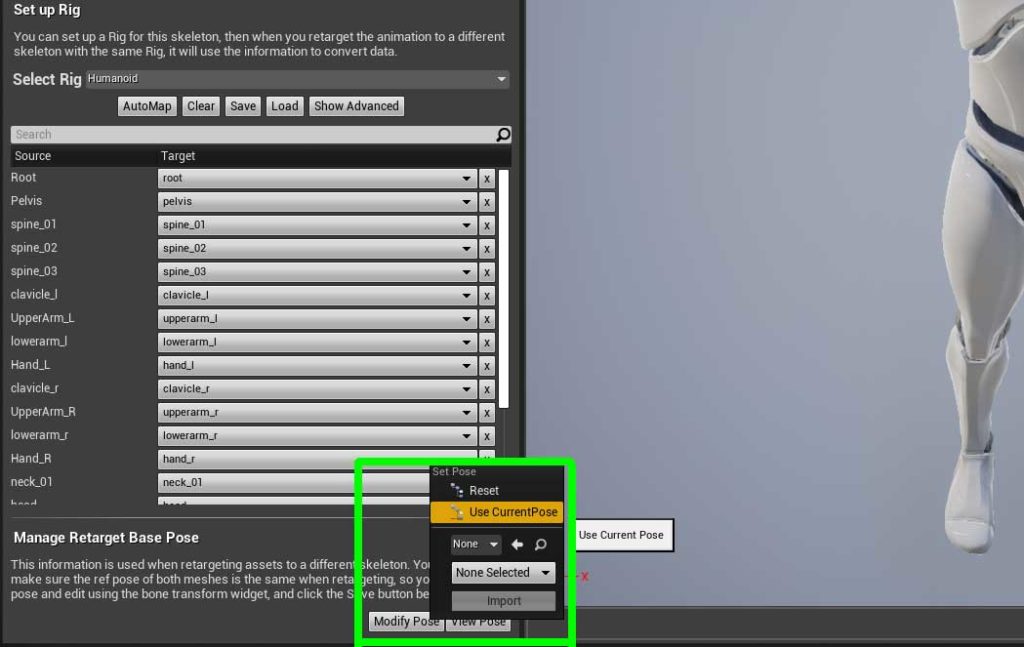
Now we have to set up the UE4 mannequin. Open the SK_Mannequin_Mobile_Skeleton and you’re going to assign the humanoid rig like you did in the Mixamo skeleton. When you do this it will automatically map and you don’t need to change anything there this time.
However you do need to update the mannequin pose from the A-pose that you can see at the moment, to match the T-pose of the Maximo skeleton. There are just 4 joints to change for that.
upperarm_r and upperarm_l rotate 45 degrees along the y axis
lowerarm_r and lowerarm_l rotate -20 degrees along the z-axis
I’ve done a video which might help explain.
Set the T-pose to be the current pose Modify Pose > Select Current pose
SAVE ALL
STEP 1C – APPLY ANIMATION TO UE4 MANNEQUIN
Find your Mixamo Animation Sequence. I’m using my Anim_acknowledge for this one. Right click and select Retarget Anim Assets > Duplicate Anim Assets and Retarget
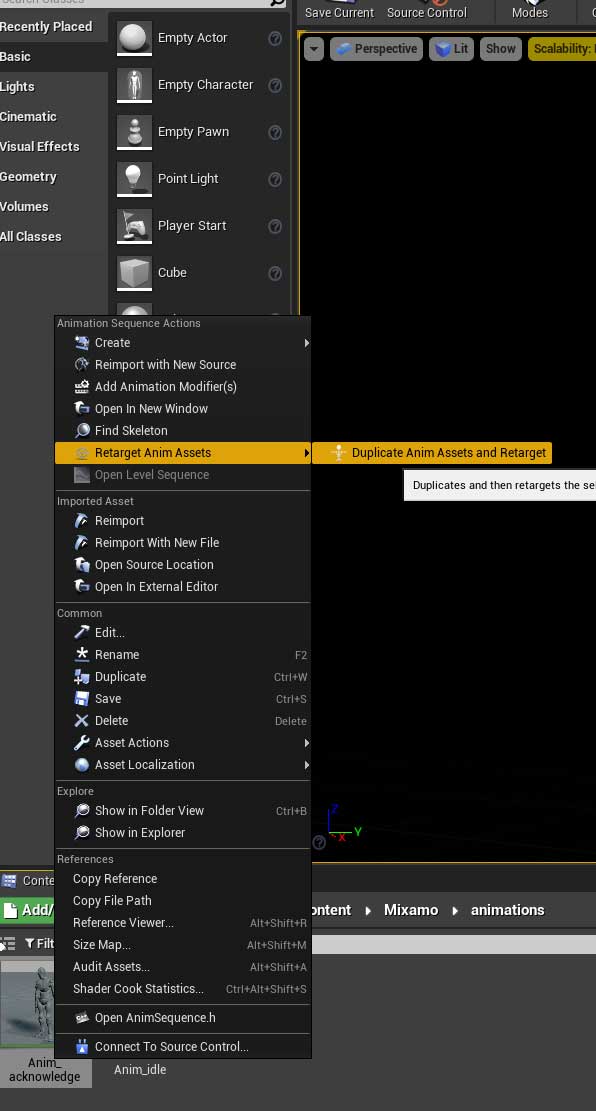
Choose the SK_Mannequin_Mobile and it will show up in your Target window
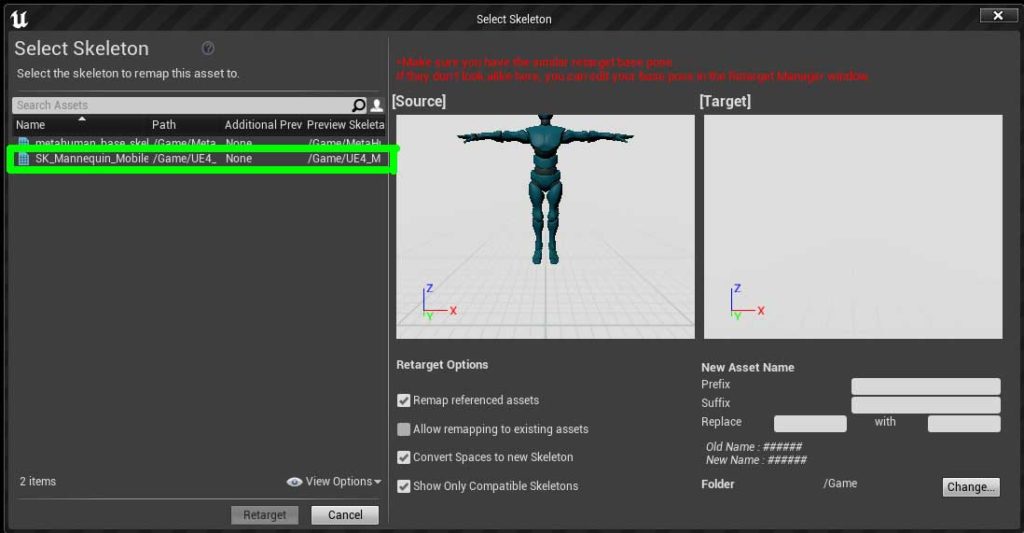
Choose Retarget
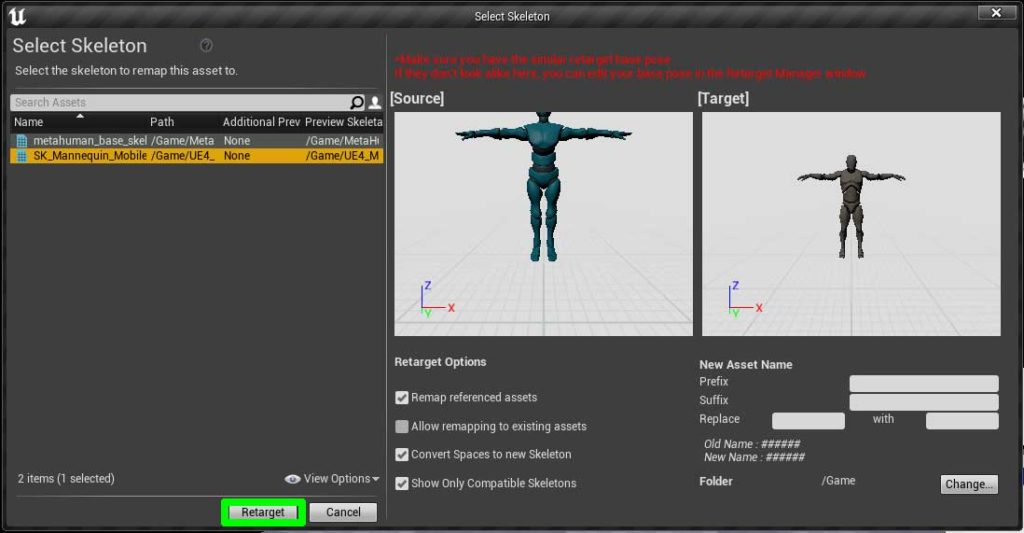
This will save a new animation in your main Content Folder which has your mixamo animation now applied to your UE4 Mannequin. Move it to a folder where you can keep all your Mannequin animations together.
SAVE ALL
Great so now you’re half way there. Next we need to get the animation from the UE4 Mannequin to your Metahuman
STEP 2 – APPLY ANIMATION TO YOUR METAHUMAN
Right so I’m going to assume here that you have your metahuman in your project file already so let’s get started
Right click on the animation that you just created and choose Asset Actions > Export
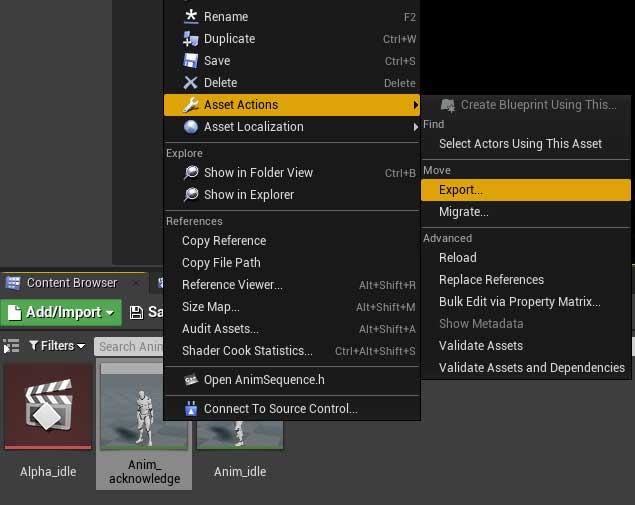
Keep all the defaults and hit export

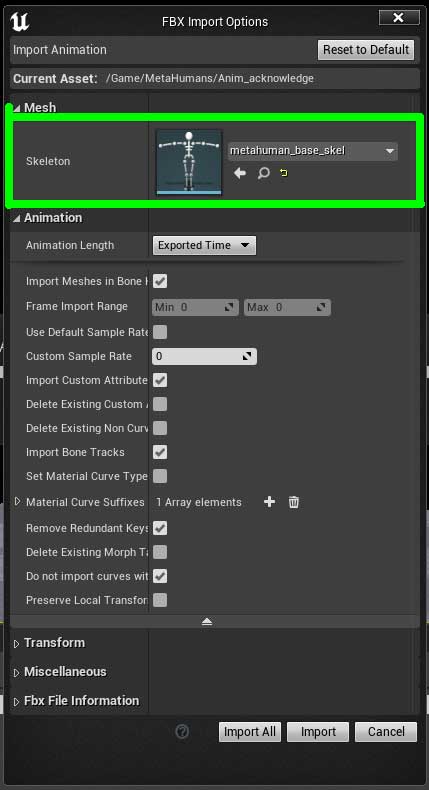
Now you need to import it for the Metahuman so keep it separate from your Mannequin animations. I save mine in my metahumans folder. Right click in your folder and select import and find your anim and hit open. Now with the import setting the important bit here is to assign the metahuman skeleton. so find the metahuman_base_skel from the dropdown and choose import. Again ignore the warnings.
SAVE ALL
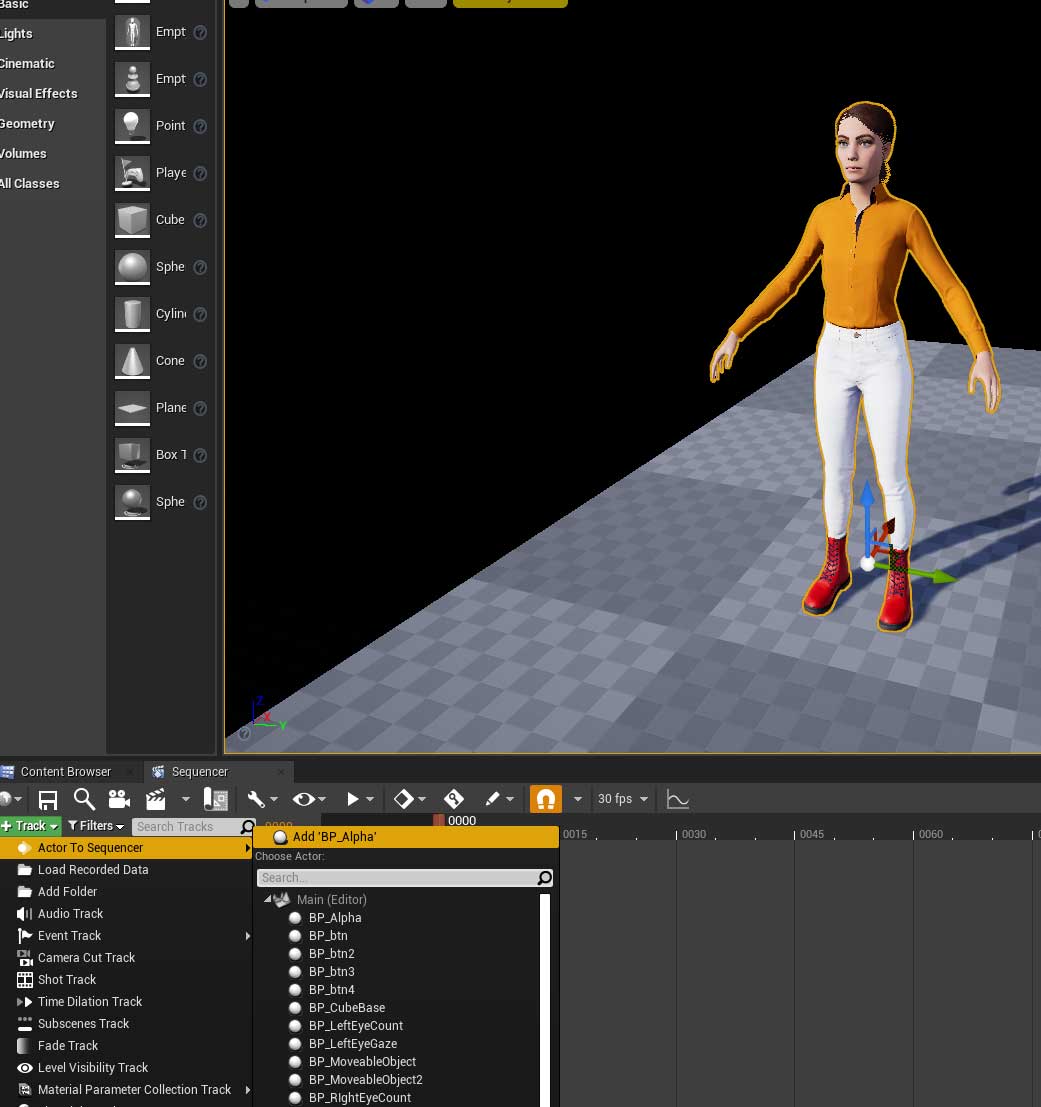
The next thing to do is add a Level Sequence. To do that go to your Content Browser again and select import > Animation > Level Sequence and give it a name. I’m going to apply my acknowledge animation to my metahuman called Alpha, so I’m going to call my Level sequence Alpha_acknowledge

Open your level sequence and in the viewport select your metahuman. Back in the Sequencer window select the green +Track button > Actor to Sequence > Your metahuman. Your metahuman should be at the top of the list because you have it selected in the viewport
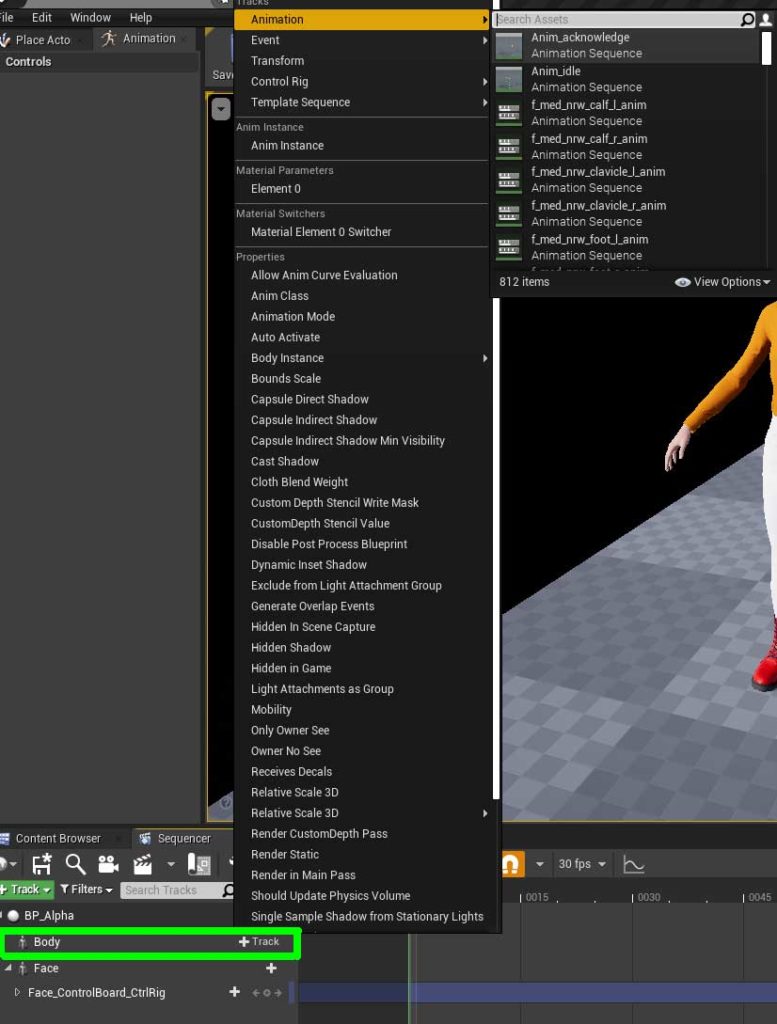
You’ll see in the list under the Body tag that the metahuman has a ControlRig. We don’t need that so go ahead and delete it.

And then for the Body we’re going to add our animation that we just imported. So select the +Track next to Body > Animation > Your new animation. My animation is the Anim_acknowledge.
Now it’s most likely that the metahuman will be slightly distorted because the UE4 Mannequin will be a slightly different size to the Metahuman so let’s make a little adjustment to fix that.
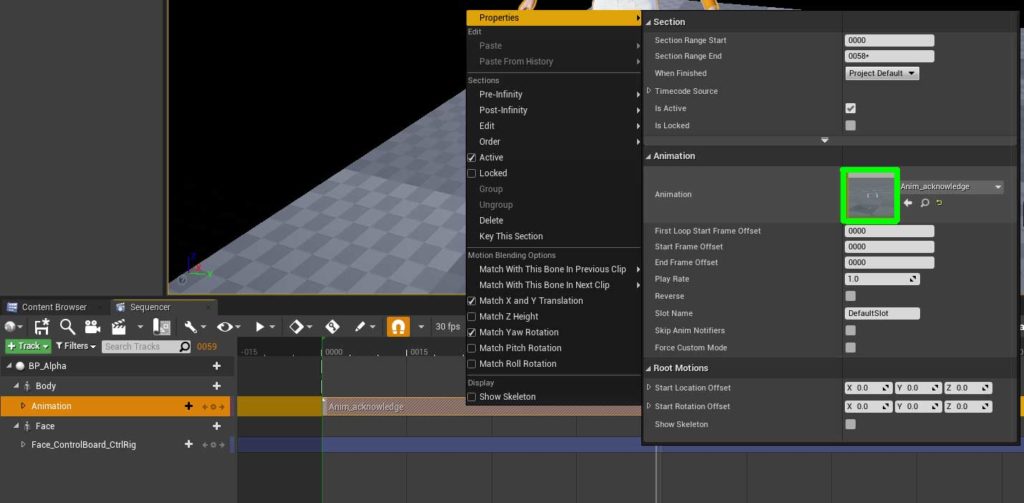
Right click on the purple animation line in the Sequencer > Properties > Then double click on the animation
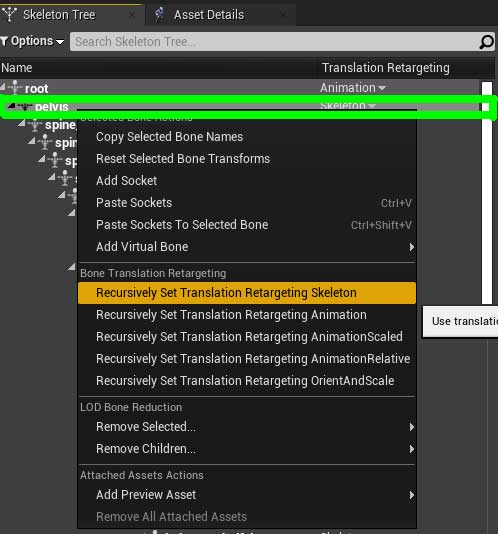
Go to the Skeleton Tree tab and select options > Show Retargeting Option

Right click on pelvis and select Recursively Set Translation Retargeting Skeleton
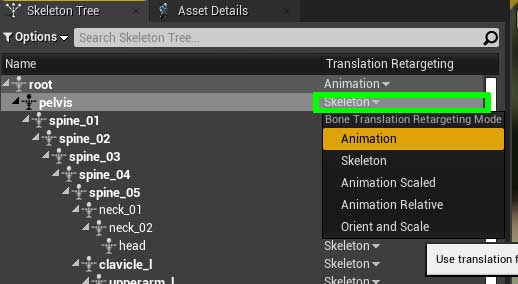
And then we want to reset just the pelvis back to animation so click on the skeleton dropdown on the pelvis and choose Animation
SAVE ALL
Go back to the main level and press play on the Sequencer and you will see it playing on your metahuman