So in your Hololens app you can add UX buttons pretty easily. I’m going to do something super simple and set up 4 buttons that are going to change the colour of an interactive cube.
STEP 1 CREATE CUBE BLUEPRINT WITH FUNCTIONS
In your Content Window select Add/Import >> Blueprint Class >> Actor and call it something generic like CubeBaseClass. Double click to open it.
In the components panel select Add Component >> Cube

In the Functions panel select the + to Add Function and name that function funcChangeColor

Now we’re going to pass through the new material that we want to assign to the cube, so lets go to the FunctionChangeColor graph editor and add that in. So go to the Details panel and go down to the Inputs section and click on the + to Add Parameter.
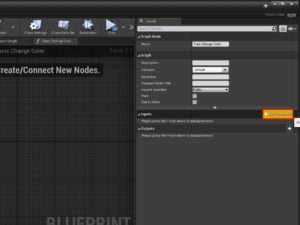
Call the new param Material and in the search box type Material and select the blue object reference option.
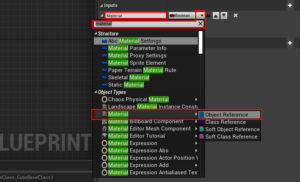
Tick the Pass by Reference checkbox and check that your Inputs looks exactly the same as this pic.

Now it’s time to go into the function event graph. Left click off the pin and create a new Set Material(cube) node.

Now we need to create a reference to the cube so the function can assign the material to it. In the My Blueprint panel, scroll down to components and click and drag the Cube into the event graph and choose Get Cube
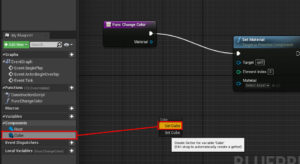
Now click and drag the cube pin to the set material Target Pin to assign the cube as the target to change the material of.

Now click and drag to link up the Func Change Color Material Pin to the Set Material Material Pin
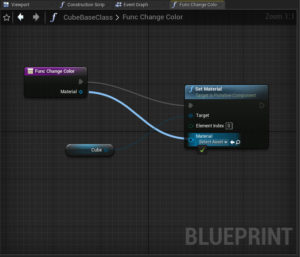
VERY IMPORTANT – Compile and save
STEP 2 CREATE 4 NEW MATERIALS
Since you have the UX Tools installed you can go to the Materials folder and duplicate M_SimpleLit_Color 4 times, rename them with the colour you want to change it to. eg MaterialBlue, MaterialOrange, MaterialPink, MaterialGreen.

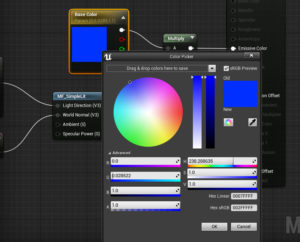
Double click to open each material and then click on Base Color node to bring up the colour wheel to change the color. Save and shut each new material
STEP 3 CREATE UX BUTTON
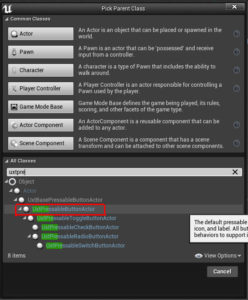
Down in your Content Window select Add New > Blueprint Class, expand the All Classes section and search for UxtPressableButtonActor. Call it BtnUpdateCube and double click to open.
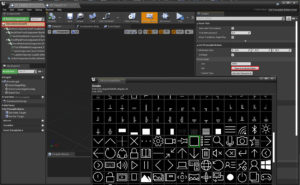
Make sure BtnUpdateCube(self) is selected in the Components panel and in the Details panel scroll down to the Uxt Pressable Button section and expand the Icon Brush section. You can scroll through and choose any icon you like.
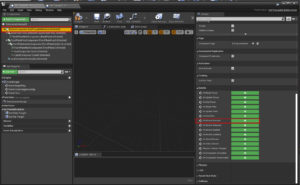
Now go back to the Components panel and click ButtonComponent(UtxPressableButton)(inherited) and scroll down the Details panel to the Events section. Click the green + button next to On Button Pressed. This will bring up the event graph.
Now we need to set up the variables we will use which is a node to hold the reference to the cube, and a node to hold the material variable to send through to the cube.
Go to the MyBlueprint panel and scroll down to the Variables section. Click the + to Add Variable. Name it Material and then go to the Details panel of your Material node and click the Variable Type dropdown and search for Material and select the blue Object Reference option.
Check the Instance Editable and Expose on Spawn boxes.
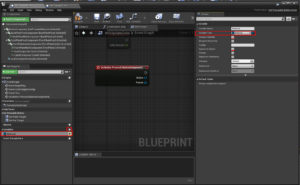
Now create your cube variable – this is pretty similar. Back in the My Blueprint panel, Variables section click + to add a new variable and call it CubeBaseClass. Go to the details panel for the CubeBaseClass and click the dropdown next to Variable Type and search for CubeBaseClass and choose the blue object reference option. Check the Instance Editable and Expose on Spawn boxes.

Drag the Material Variable from the Variables section onto the EventGraph and choose Get Material, do the same with the CubeBaseClass.
Click on the Cube Base Class pin and drag and release to place a new node. Search for the Func Change Color (which is on our Cube BaseClass)

Click on the Material pin and connect it to the FuncChangeColor Material pin
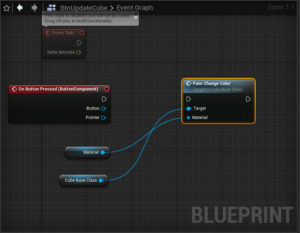
Now click and drag to connect the OnButtonPressed Pin to the Func Change Color pin. Compile and Save.

CREATE YOUR SCENE
Drag and drop you CubeBaseClass to the scene and place it at x:50 y:00 z:-10 and change the scale to x:0.1 y:0.1 z:0.1.
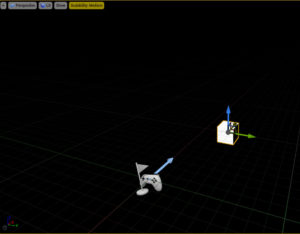
Drag and drop you BtnUpdateCube to the scene and in the Details panel scroll to the Transform section and place it at x:50 y:-20 z:-20 with z rotation 180 and scale x:2 y:2 z:2.
Scroll to the Uxt Pressable Button section and update the label to be Pink. Scroll to the Default section and drag and drop your pink material onto the square next to Material and from the drop down next to Cube Base Class, choose CubeBaseClass.
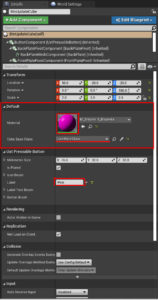
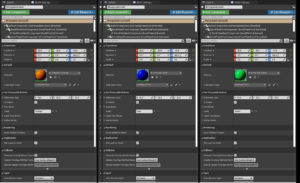
Now duplicate your button 3 times and move them so you can see them all. Update the labels to be blue, green and orange and drag in the correct materials for each of them and assign the CubeBaseClass.
TEST ON THE HOLOLENS 2
Start up your Hololens 2 and open up the Holographic remoting app. I’m assuming here that you have it installed already so if you haven’t, go install it.

Use the IP address given by the app to connect to it from Unreal. Grab the number you see here in the hololens…

And go into Unreal Project Settings, search for holographic to bring up the connection panel. Put your IP in where I have shown you and hit connect.

You’ll see the green connected response when UE is connected to the Hololens. Now go to Play >> VR Preview and you’ll see it load in your headset.
