Adding plugins to your project is pretty straight forward as long as you know what folders you need to copy and where to.
- Go to your root project folder and create a Plugins folder if there isn’t one already
- Unzip the zip you downloaded for the UXTools
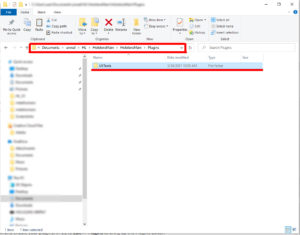
- Navigate to the Plugins folder in the unzipped files. It will be something like >> MixedReality-UXTools-Unreal-public-0.11.x >> UXToolsGame >> Plugins >>
- Copy the folders named UXTools to your project Plugins folder
And then the final thing is you need to go into Unreal and enable your plugins. In UE to Edit >> Plugins to bring up the Plugins Editor.
Scroll down to HoloLens and check Enabled
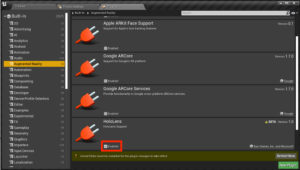
Next, ensure All is selected in the top left, and in the top right grey search box, type mixed to bring up all the Mixed Reality Plugins. Click the Enabled checkbox in the Microsoft Mixed Reality Plugins. You will be prompted to restart so go ahead and press the Restart Now button in the bottom right corner.
When you restart Unreal will build the UXTools into the project

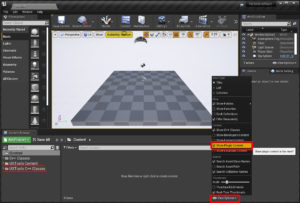
When Unreal restarts the UXTools plugin will be in your Content Browser. If you can’t see them there (and I couldn’t when I first set up my file), you can display them by adjusting the Content Browser View Options. Select >> View Options >> Show Plugin Content. You can also Show C++ Classes, but for now turn everything else off otherwise you’ll have a tonne of folders to sift through.
<<<< STEP 2 – FILE SET UP STEP 4 – CREATE A LEVEL >>>>